How to add a thumbnail to YouTube Shorts changed in 2026. For years the only option was picking a frame from the video in the mobile app, and most guides still say that. Today YouTube lets creators upload a custom image as a Shorts thumbnail in YouTube Studio on a computer, and its help page states plainly that custom Shorts thumbnails are “currently only available to add in YouTube Studio on a computer” (YouTube Help).
There is a catch: the upload button is not on every channel yet. YouTube opened it to YouTube Partner Program creators first and said it will expand to more creators over time (YouTube Blog, July 24, 2026). So the right method depends on what your channel can see.
This guide covers all three routes: uploading a custom image on desktop, picking a frame on desktop or mobile, and the embedded-frame workaround for channels without the upload option. It also gives the official size, the most common reason a Shorts thumbnail does not show, and a short action plan.
Table of Contents
- Quick Answer: Three Ways to Set a Shorts Thumbnail
- Who Can Upload a Custom Shorts Thumbnail
- How to Add a Custom Thumbnail to a Short on a Computer
- How to Change a YouTube Shorts Thumbnail After Publishing
- YouTube Shorts Thumbnail Size and File Specs
- How to Pick a Thumbnail Frame on Your Phone
- No Upload Option Yet? The Embedded Frame Workaround
- Designing a Shorts Thumbnail That Reads on a Phone
- Troubleshooting: Shorts Thumbnail Not Changing
- Shorts Thumbnail Action Plan
- FAQ
Quick Answer: Three Ways to Set a Shorts Thumbnail
| Method | Where | Who has it | What you get |
|---|---|---|---|
| Upload a custom image | YouTube Studio on a computer | YouTube Partner Program creators first, expanding over time; account must be verified | Any 9:16 image you design |
| Pick a suggested or any frame | Desktop: three suggested frames. Mobile: any frame from the video | Everyone | A still from the video itself |
| Embedded frame workaround | Your video editor, then the frame picker | Everyone | A designed image, shown as one frame of the video |
Sources: YouTube Help for the desktop-only upload and the verification requirement; the YouTube Blog announcement for the Partner Program rollout and frame selection, which says creators can “choose from three suggested thumbnail frames for Shorts on desktop” and “can still pick any frame from the video through the YouTube app on mobile.”
If you see an Upload file option under “Thumbnail” when editing a Short in YouTube Studio, use it. Everything else in this guide is a fallback.
Who Can Upload a Custom Shorts Thumbnail
Two conditions decide whether the upload option appears:
- The rollout. On July 24, 2026 YouTube announced that “YouTube Partner Program creators can start uploading custom thumbnails for Shorts” and added “We’ll expand this to more creators over time” (YouTube Blog). A channel outside the Partner Program may not have it yet.
- Verification. YouTube’s help page says your account must be verified to use the feature (YouTube Help). It is the same verification YouTube asks for before you can upload custom thumbnails on regular videos.
The thumbnail also has to follow YouTube’s Community Guidelines. The help page warns that a thumbnail that breaks them can be rejected and lead to a strike on the account. Misleading or graphic covers are not worth the risk on a format where the cover is seen mostly outside the feed.
If you are not in the Partner Program yet, the frame picker and the embedded-frame workaround below still give you control over what viewers see.
How to Add a Custom Thumbnail to a Short on a Computer
These are the steps from YouTube Help:
- Sign in to YouTube Studio on a computer.
- From the left menu, select Content, then the Shorts tab at the top.
- Find the Short you want to edit and click the edit icon next to it.
- Below Thumbnail, click Upload file and choose an image from your computer. YouTube recommends a 9:16 aspect ratio for uploaded files.
- Click Save.
YouTube also notes that “it may take time for your thumbnail changes to appear on YouTube”, so do not re-upload right away if the old frame still shows for a while.
The official YouTube Creators channel has a short walkthrough of the same flow: How to upload a custom Shorts thumbnail.
For the long-form version of this process, including the verification step and the mobile app, see how to add a thumbnail on YouTube.
How to Change a YouTube Shorts Thumbnail After Publishing
Changing a thumbnail uses the same screen as adding one. The steps above start from the list of Shorts you have already uploaded, so a published Short can get a new cover at any time:
- Open YouTube Studio on a computer, then Content and the Shorts tab.
- Open the Short and go to the Thumbnail section.
- Upload a new image, or switch to one of the suggested frames.
- Save, then give YouTube some time to update the cover across surfaces.
This makes Shorts covers testable. If a Short gets impressions in search or on your channel page but few views from those surfaces, a clearer cover is one of the cheapest changes to try. Change one thing at a time (the image, not the title too) so you know what made the difference. For what counts as a healthy click-through rate, see what is a good click-through rate on YouTube.
On a phone, the change is limited to picking a different frame: custom image uploads for Shorts are desktop only.
YouTube Shorts Thumbnail Size and File Specs
All numbers below come from YouTube’s thumbnail help page.
| Spec | Shorts thumbnail | Regular video thumbnail |
|---|---|---|
| Recommended resolution | 2160 x 3840 px | 3840 x 2160 px |
| Minimum | 640 px tall | 640 px wide |
| Aspect ratio | 9:16 | 16:9 |
| File types | JPG or PNG | JPG or PNG |
| Max file size | 50 MB (desktop upload) | 2 MB on mobile, 50 MB on desktop |
| Where to upload | YouTube Studio on a computer only | Desktop or mobile |
Many guides still quote 1080 x 1920 as the Shorts thumbnail size. That is a valid 9:16 image, well above the 640 px minimum, but it is half of what YouTube now recommends in each direction. If you design from scratch, start at 2160 x 3840. If you only have a 1080 x 1920 image, it will work; just keep text large enough that it survives being shown small.
The Shorts video itself and its thumbnail share the 9:16 shape. For the video specs (resolution, length, safe areas for the on-screen buttons), see the YouTube Shorts format guide.
Why a 16:9 thumbnail on a Short backfires
YouTube’s help page has a note that catches people who reuse their long-form thumbnail: “Vertical videos with 16:9 custom thumbnails will be replaced by an auto-generated 4:5 thumbnail on the home, explore, and subscription pages.” The 16:9 image still shows on the watch feed, in watch history and on non-mobile platforms (YouTube Help).
In practice, a horizontal cover on a Short is replaced by an automatic crop on some of the surfaces where people browse. Always upload a vertical 9:16 image for a Short. If you only have a 16:9 design, convert it first: the free YouTube image resizer has a 1080 x 1920 vertical preset. Its Fit mode keeps the whole design and fills the empty space above and below with a blurred copy, and Crop to fill lets you slide the crop to keep the subject in frame.
How to Pick a Thumbnail Frame on Your Phone
Every creator can still choose a frame from the video. YouTube’s announcement confirms that you “can still pick any frame from the video through the YouTube app on mobile”, and on desktop you can choose from three suggested frames (YouTube Blog).
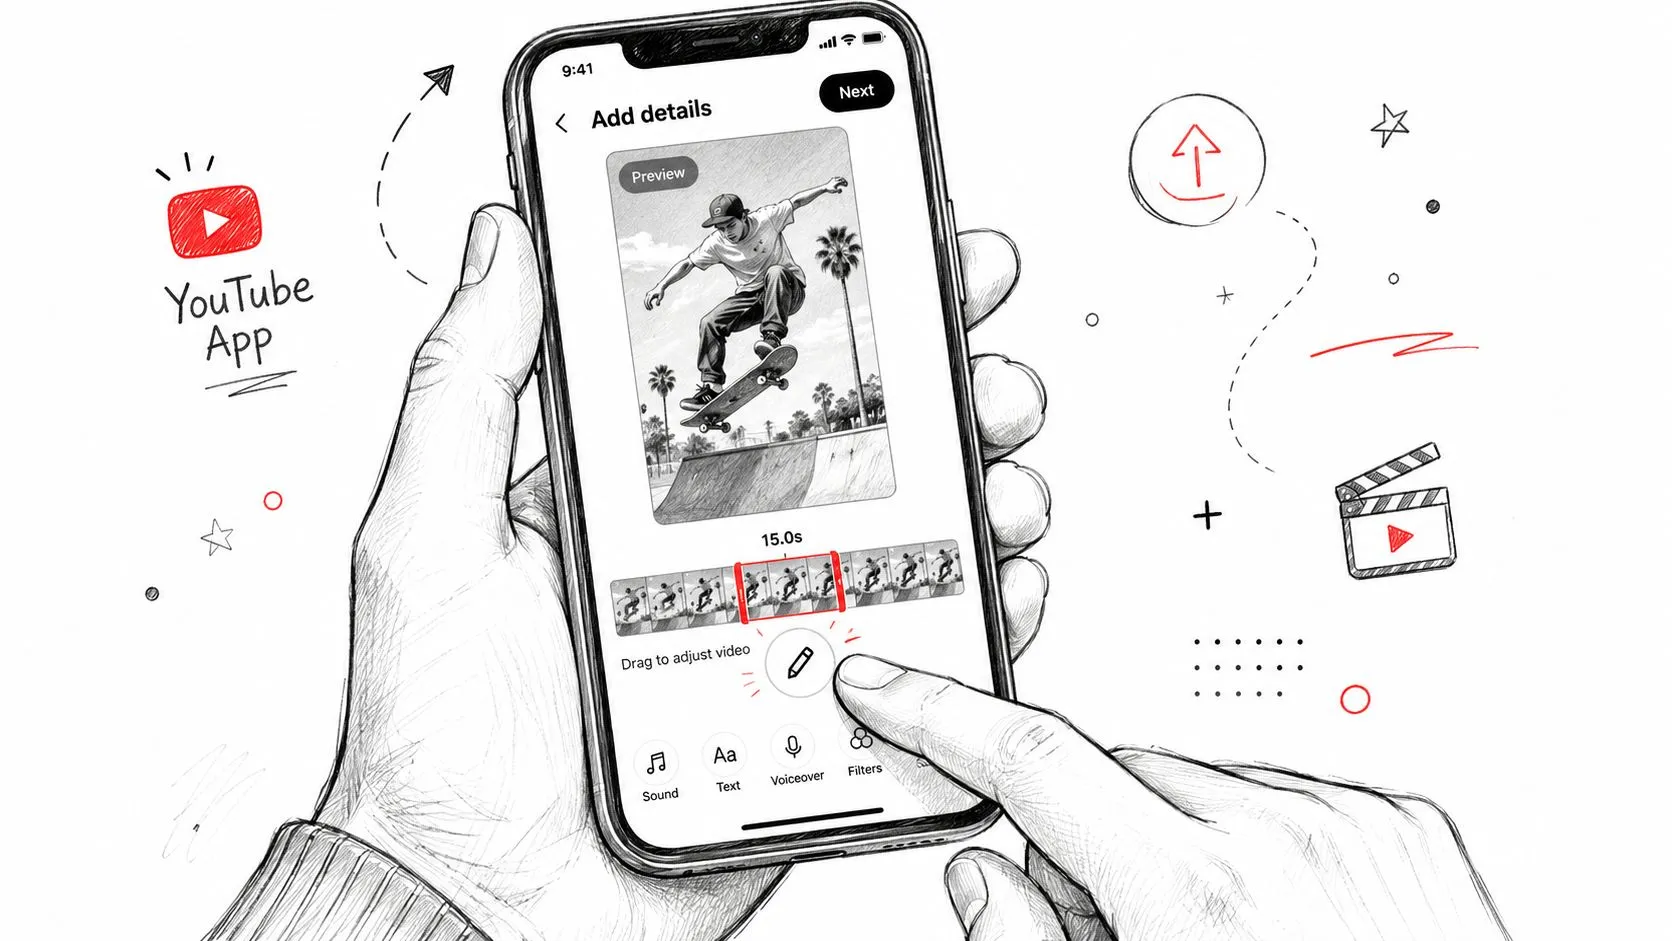
When you choose a frame in the app:
- Scrub slowly to the exact frame. On a narrow phone scrubber, one finger movement can jump several frames.
- Avoid motion. Fast cuts and camera moves produce blurred frames. A held shot, a clean face or a finished result reads best.
- Check the face. Mid-blink and mid-word frames are the most common reason a frame-picked cover looks wrong.
- Confirm before publishing. Look at the preview once more and make sure it is the frame you meant, not the one next to it.
Frame picking only works as well as the footage. If no moment in the Short makes a good still, plan one: hold a clean, well-lit shot of the subject for a second during filming. That gives the picker something to work with, with no editing tricks.
No Upload Option Yet? The Embedded Frame Workaround
If your channel cannot upload a custom image yet, you can still use a designed thumbnail: put the image into the video as a short still, then pick that frame as the cover.
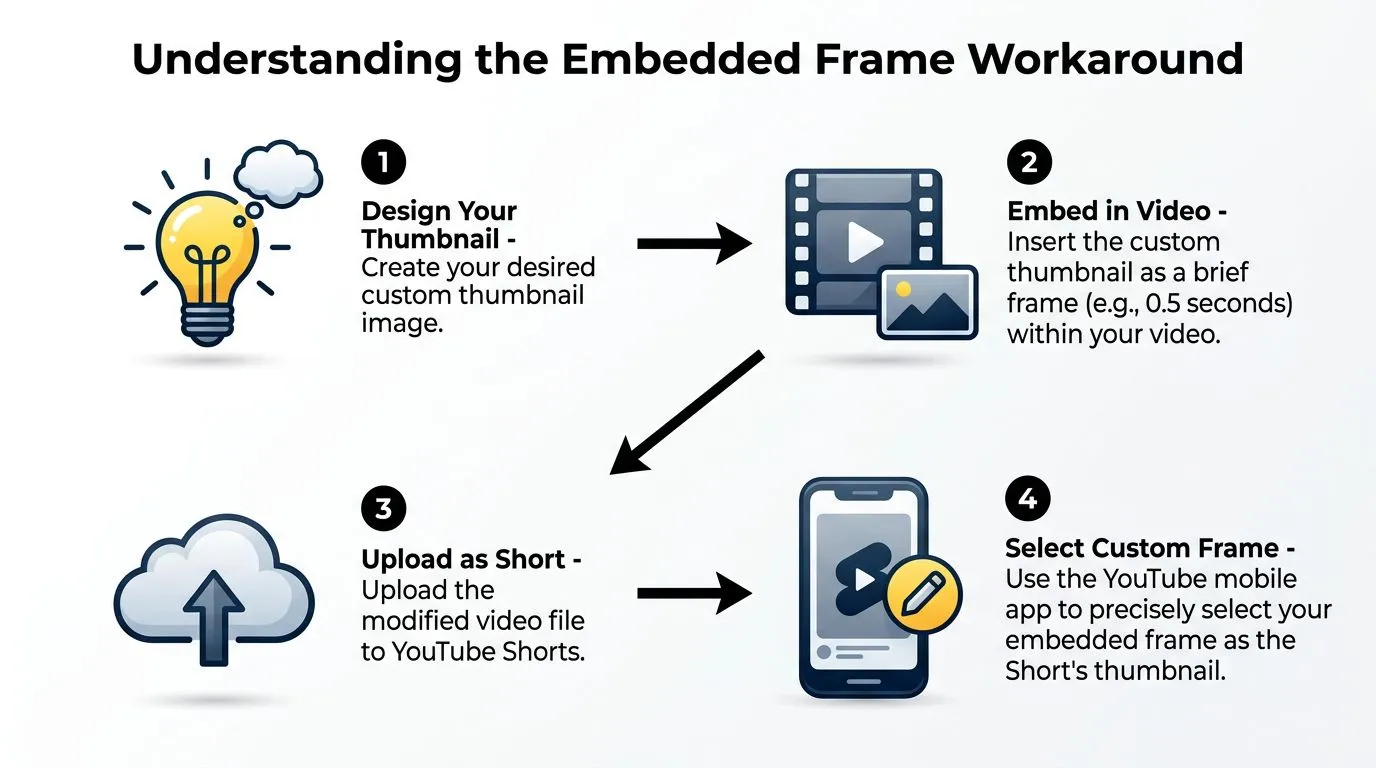
- Design the image at 9:16. Use the same rules as a real custom thumbnail (see the next section).
- Place it on the timeline in any editor that handles still images: CapCut, iMovie, Premiere Pro, Final Cut Pro or DaVinci Resolve.
- Hold it long enough to grab. A few frames are hard to land on with a phone scrubber. Around half a second to a second is easier to hit.
- Avoid transitions into or out of it. A fade makes the frames around the image half-visible, and the picker may grab one of those.
- Export, upload, and pick that frame in the frame selector (mobile app or the suggested frames on desktop, if your image happens to be one of them).
Treat this as a bridge, not a long-term system. Once the Upload file option appears in YouTube Studio, it does the same job without adding anything to the video.
Start or end of the video
Where the still goes is a trade-off:
- At the start, it is easy to find in the picker, but every viewer sees it before the hook. On a format where the first second decides whether people keep watching, that costs attention.
- At the end, the hook stays intact and the still acts like a closing card. It is equally easy to find by dragging the scrubber all the way right.
For most Shorts, the end is the safer choice.
Mind the length limit
The still adds time. Shorts can run up to three minutes (see the Shorts format guide for the details), so a Short already close to that limit can go over it once the still is added. Leave a few seconds of headroom.
Designing a Shorts Thumbnail That Reads on a Phone
A Shorts cover is mostly seen small: in search results, on the channel’s Shorts tab, in subscription and home grids. The rules that work for long-form thumbnails apply with less room:
- One subject. A face, a product, a finished result. Two or three competing subjects turn into noise at phone size.
- Three or four words at most, in a heavy typeface. Preview fonts against your own image with the free YouTube thumbnail font previewer before committing.
- Strong contrast between the subject, the text and the background.
- Keep text and faces in the middle. Edges of a vertical image are where crops and on-screen buttons land on various surfaces.
- Test it small. Shrink the image to the size of a grid tile on your phone. If the idea is not obvious, simplify.
For more on vertical layouts and safe placement, see the YouTube Shorts thumbnail design guide.
Making the image
Any editor with a 2160 x 3840 canvas works. If you would rather start from the video idea than a blank canvas, Thumbo’s AI thumbnail generator has a Shorts 9:16 format switch on its style screen: it renders the cover natively vertical (not a cropped 16:9 image), with style packs made for Shorts. You describe the topic, pick a style, and edit the result in plain words. Downloads are JPEG files under 2 MB, far inside the 50 MB desktop limit for Shorts thumbnails.
Troubleshooting: Shorts Thumbnail Not Changing
| Problem | Likely cause | Fix |
|---|---|---|
| No Upload file option for a Short | The channel is not in the rollout yet, or the account is not verified | Verify the account; until the option appears, pick a frame or use the embedded-frame workaround |
| Trying to upload on a phone | Custom Shorts thumbnails are desktop only | Use YouTube Studio on a computer |
| New thumbnail saved, old one still showing | Changes take time to appear | Wait before re-uploading; check again later |
| Home or subscriptions show a different crop | A 16:9 image was uploaded for a vertical video | Upload a 9:16 image instead |
| Blurry or soft cover | Small source image, or a frame with motion blur | Export at 2160 x 3840 or at least 1080 x 1920; pick a still frame |
| Picker grabs the wrong frame | The designed still is too short or fades in | Hold it longer, remove transitions, scrub slowly |
| Thumbnail removed or rejected | It breaks the Community Guidelines | Replace it with a cover that matches the video honestly |
Shorts Thumbnail Action Plan
- Open YouTube Studio on a computer, go to Content, then Shorts, and open one Short. Check whether Upload file appears under “Thumbnail”.
- If it does, design a 9:16 cover at 2160 x 3840 with one subject and at most four words, and upload it.
- If it does not, verify the account, then use the frame picker. For Shorts where no frame works, add a designed still at the end of the video and pick it.
- Never upload a 16:9 image for a Short; convert it to 9:16 first.
- Preview every cover at grid-tile size on a phone before saving.
- After a week, compare views from search and the channel page for Shorts with and without designed covers, and keep what works.
- Recheck YouTube Studio every few weeks if you do not have the upload option: YouTube said it is expanding access over time.
FAQ
Can you add a custom thumbnail to YouTube Shorts?
Yes, in YouTube Studio on a computer. YouTube opened custom Shorts thumbnail uploads to YouTube Partner Program creators first and is expanding access over time; the account must be verified. Everyone can still choose a frame from the video.
Why can’t I change my YouTube Shorts thumbnail?
The most common reasons are trying to do it in the mobile app (uploads are desktop only), a channel that does not have the upload option yet, or an unverified account. If you just saved a new thumbnail, it can also take a while to appear.
Can I change a Shorts thumbnail on my phone?
Only by picking a different frame from the video in the YouTube app. Uploading a custom image for a Short currently works only in YouTube Studio on a computer.
What size should a YouTube Shorts thumbnail be?
YouTube recommends 2160 x 3840 pixels at a 9:16 aspect ratio, with a minimum height of 640 pixels. JPG or PNG files up to 50 MB can be uploaded from a computer.
Can I use my 16:9 video thumbnail for a Short?
It is not a good idea. YouTube replaces a 16:9 custom thumbnail on a vertical video with an automatic 4:5 crop on the home, explore and subscription pages. Convert the design to 9:16 before uploading.
Do Shorts thumbnails matter if most views come from the feed?
In the swipe feed the video starts playing, so the cover matters less there. It matters wherever viewers choose from a list: search results, your channel’s Shorts tab, and home and subscription grids. Those are the places a clear cover earns extra views.